Field notes
Core handling that survives the trip to the logging shed
Tray selection, orientation marking, and stacking for long-term storage.
4 min read
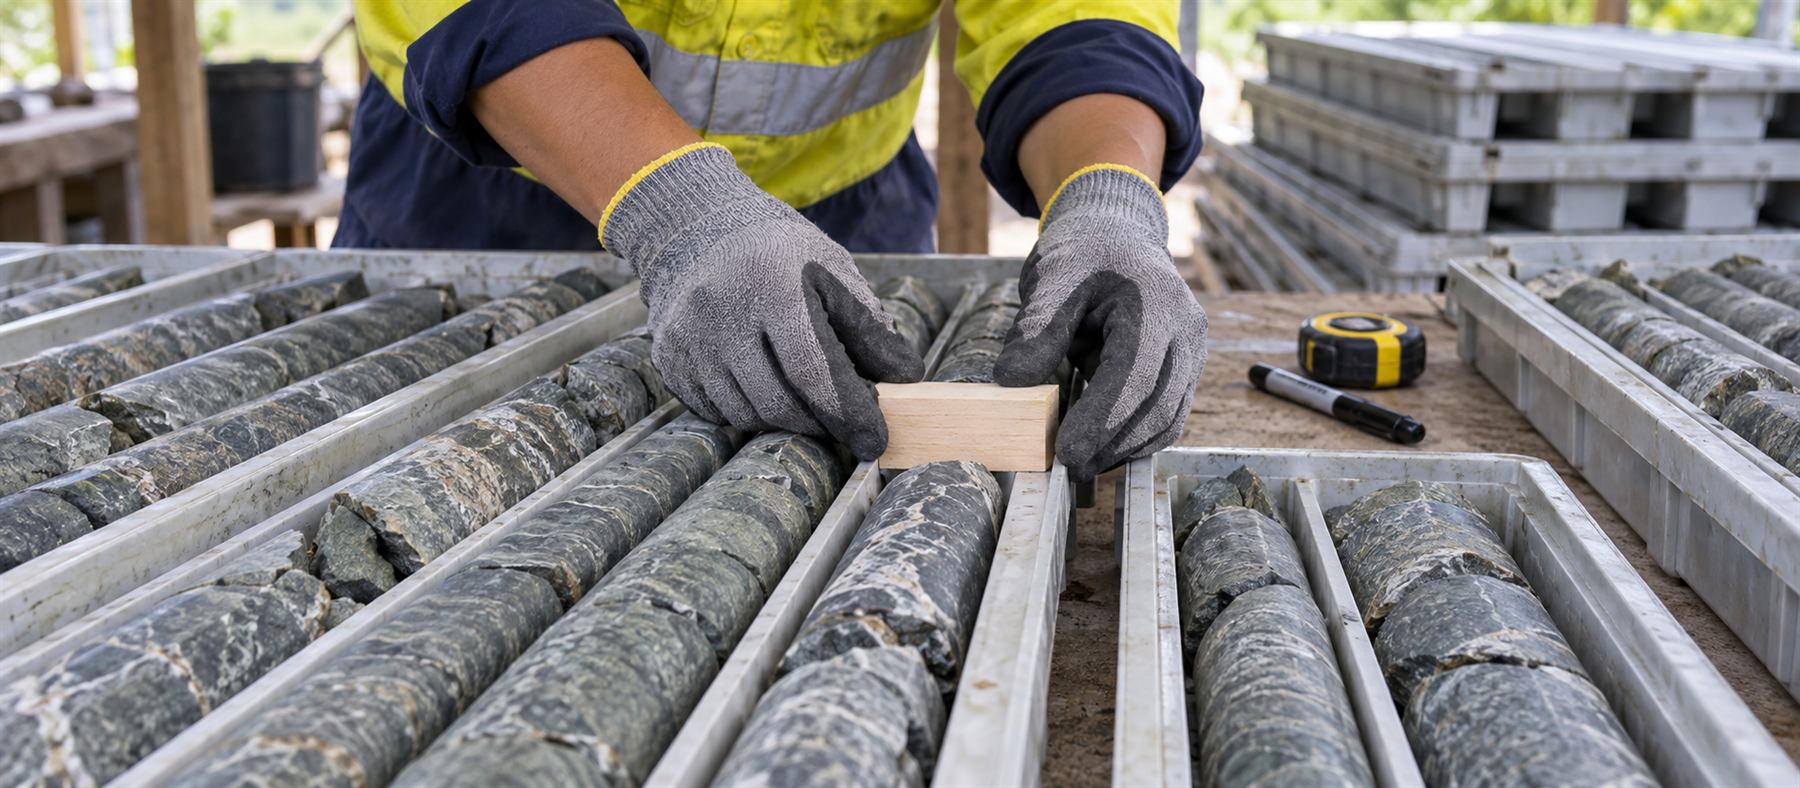
Core is the most expensive rock anyone will ever own, and a surprising amount of it is damaged after it comes out of the ground rather than while it is being cut. Most of the fractures logged as geotechnical features were made at the extrusion, in a loose tray, or on the drive out.
At the rig, before it leaves the tube
- Extrude, do not hammer. Push or pump the core out of the inner tube. Beating on the tube makes clean breaks that get logged as natural fractures, and nobody downstream can tell the difference.
- Keep the run order absolutely. Left to right, top row first, every time, with no gaps left to be filled in later.
- Block every run. A depth block at the end of each run carrying from and to depths and the recovery for that run.
- Mark orientation while the core is still in sequence. If the hole is oriented, the line goes on before anything moves.
- Measure recovery and RQD at the rig, while the run is intact. Doing it at the shed measures the drive out as much as the ground.
The cheapest quality control on a drilling program
A driller who blocks every run without being asked. Everything downstream — logging, sampling, resource estimation, the geotechnical model — inherits that discipline or inherits its absence.
Choosing the tray
- Match the channel to the core size. BQ, NQ, HQ and PQ each want their own tray. Core rattling in an oversized channel abrades and rounds at every joint; core forced into an undersized channel breaks at the ends.
- Plastic trays (PVC or HDPE) are light, will not rust or rot, and hold up in humid coastal storage. For most tropical programs this is the sensible default.
- Steel trays are strong and stack well under real load, but they rust and can stain the core. Galvanised where the budget reaches.
- Timber is the cheapest to buy and the most expensive to own in this climate. It warps, it rots, and it feeds termites in a storage yard.
- Lids earn their keep twice: transport protection first, archive protection second.
- Chip trays for RC deserve the same discipline at smaller intervals — the sample is no less permanent for being smaller.
Marking that is still readable in five years
- Write on the block and on the end of the tray. Not one or the other — the one you skipped is the one that goes missing.
- Permanent marker is not permanent in UV. Paint pen, engraved tag or embossed label for anything heading to long-term storage.
- Label the end of the tray that stays visible when trays are stacked, otherwise every retrieval means unstacking the pile.
- Photograph every tray wet and dry before it leaves site. The photograph is the only version of the core that cannot be dropped.
The drive out
A corrugated haul road undoes an entire shift of careful handling in about forty minutes. Pack for the road, not for the fifty metres to the ute.
- Fill the voids. Anything that lets core move will round the end of every piece in the tray.
- Lids on and strapped, and stack so the load bears on the tray frame rather than on the core.
- Palletise and band for road transport, and respect the tray’s rated stack height rather than the height the truck will take.
- Creek crossings and corrugations do more damage than the drilling did. Slow down or repack.
At the shed, and after
- Rack it. Trays on the ground meet water, termites and forklifts, usually in that order.
- Keep it under cover. UV destroys the labels long before it touches the rock, and an unlabelled tray is a tray of gravel.
- Hold the retained half-core to the same standard as the assayed half. Being able to re-log and re-sample years later is the entire reason it was kept.
An archive is only as good as its worst label
When a resource gets audited, or a deposit changes hands, somebody will go looking for a specific interval drilled years before they arrived. What they find — or do not — is decided by the discipline in this article, at the rig, on the day.
Related in the catalogue